
Hello everyone!
Configuring IPsec IKEv2 on pfSense® software
If you are looking to enhance the security of your network, setting up an IPsec IKEv2 VPN is a great solution. In this post, we will guide you through the process of configuring IPsec IKEv2 on pfSense® software, a powerful open-source firewall and router platform.
Firstly, make sure you have the pfSense® software installed and running. Then, follow these steps:
Step 1: Enable the IPsec Service
In order to start configuring IPsec IKEv2, you need to enable the IPsec service on pfSense®. To do this, navigate to the pfSense® web interface and go to VPN > IPsec. Check the box next to Enable IPsec and click Save.
Step 2: Create an IPsec Phase 1 Configuration
Now, let’s create the Phase 1 configuration, which includes the settings for the IKE phase. Under the Mobile Clients section, click Add P1.
You will need to specify various settings:
- Authentication Method: Select the appropriate authentication method based on your requirements.
- Negotiation Mode: Choose Main or Aggressive mode.
- My Identifier: Specify the identifier that will be used during Phase 1.
- Peer Identifier: Enter the identifier that the remote VPN client should use.
- Encryption Algorithm: Choose the encryption algorithm for Phase 1.
- Hash Algorithm: Select the desired hashing algorithm.
- DH Key Group: Choose the Diffie-Hellman key group.
Once you have entered all the necessary settings, click Save.
Step 3: Configure the IPsec Phase 2 Proposal
The Phase 2 proposal contains the settings for the IPsec phase, where the actual data encryption takes place. To configure the Phase 2 proposal, scroll down to the Phase 2 Proposal (SA/Key Exchange) section and click Add P2.
Specify the following settings:
- Mode: Choose whether you want to encrypt all traffic (Tunnel) or just traffic to a specific subnet (Transport).
- Local Network: Enter the local subnet or host address.
- Protocol: Select the desired protocol.
- Encryption Algorithms: Choose the encryption algorithms for Phase 2.
- Hash Algorithms: Select the desired hashing algorithms.
- PFS Key Group: Choose the Perfect Forward Secrecy key group.
Once you have entered all the necessary settings, click Save.
Step 4: Create an IPsec Mobile Client
The final step is to create an IPsec mobile client configuration for the remote devices that will connect to the pfSense® VPN. Under the Mobile Clients section, click Add Phase 1.
Specify the following settings:
- Remote Gateway: Enter the public IP address or hostname of the pfSense® firewall.
- Authentication Method: Choose the authentication method used by the remote device.
- Identifier: Enter the identifier used by the remote device.
- Pre-Shared Key: Specify the pre-shared key for the VPN connection.
Once you have entered all the necessary settings, click Save.
That’s it! You have successfully configured IPsec IKEv2 on your pfSense® software. Now, let’s move on to the next section to learn how to set up the VPN connection on your Android device.
Setting Up IPsec IKEv2 VPN on Android

If you own an Android device and want to connect to the IPsec IKEv2 VPN you just configured on your pfSense® firewall, follow these instructions:
Step 1:
Go to the Settings app on your Android device and select Network & Internet.
Step 2:
Tap VPN to access the VPN settings.
Step 3:
Tap the + icon to add a new VPN configuration.
Step 4:
Choose IPSec/IKEv2 as the VPN type.
Step 5:
Enter a name for the VPN connection and fill in the following details:
- IPsec/IKEv2 server: Enter the public IP address or hostname of the pfSense® firewall.
- IPsec/IKEv2 identity: Specify the identifier used by the remote device.
- IPsec/IKEv2 pre-shared key: Enter the pre-shared key you set up for the VPN connection.
- Username and password: If required, fill in your VPN username and password.
Step 6:
Tap Save to create the VPN configuration.
Step 7:
Finally, tap the VPN connection you just created to establish the IPsec IKEv2 VPN connection. You are now securely connected to your pfSense® firewall!
Remember to consult your network administrator or refer to the pfSense® documentation for further advice if you encounter any issues during the configuration process.
We hope this guide was helpful in setting up IPsec IKEv2 on pfSense® software and connecting to it from your Android device. For more configuration recipes and instructions, please visit the pfSense® software documentation.
Thank you for reading!
If you are searching about [VPN] 如何在華碩無線路由器設定VPN伺服器 – IPSec VPN | 官方支援 | ASUS 台灣 you’ve visit to the right web. We have 5 Pictures about [VPN] 如何在華碩無線路由器設定VPN伺服器 – IPSec VPN | 官方支援 | ASUS 台灣 like [VPN] 如何在華碩無線路由器設定VPN伺服器 – IPSec VPN | 官方支援 | ASUS 台灣, Android Instructions and also Android IPSec with IKEv2 Setup Guide. Read more:
[VPN] 如何在華碩無線路由器設定VPN伺服器 – IPSec VPN | 官方支援 | ASUS 台灣
![[VPN] 如何在華碩無線路由器設定VPN伺服器 - IPSec VPN | 官方支援 | ASUS 台灣](https://km-ap.asus.com/uploads/PhotoLibrarys/66aa29cd-c141-45f0-9576-77de29c4f347/20230613104337819_1.png)
www.asus.com
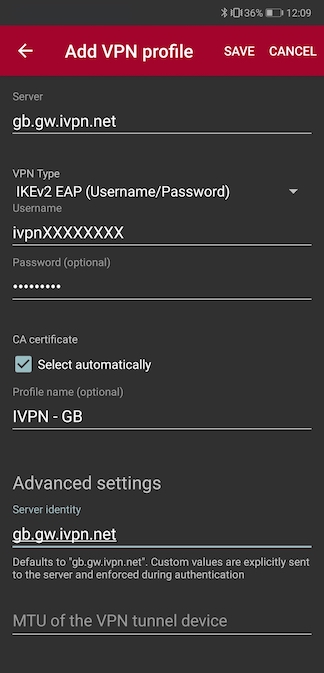
Android IPSec With IKEv2 Setup Guide
www.ivpn.net
Android Instructions
psc.testbirds.com
How To Setup IKEv2/IPSec MSCHAPv2 VPN On Windows Server 2019 – Super User

superuser.com
PfSense® Software Configuration Recipes — Configuring IPsec IKEv2
docs.netgate.com
Android instructions. Pfsense® software configuration recipes — configuring ipsec ikev2. [vpn] 如何在華碩無線路由器設定vpn伺服器